Table of Contents
- Wallpaper-Safe Art Hanging Fundamentals
- Before You Begin: Surface Assessment and Tool Preparation
- Step 1: Plan Your Art Layout for a Balanced Display
- Step 2: Choose Hanging Methods That Protect Wallpaper
- Step 3: Test Adhesion and Clean the Wallpaper Safely
- Step 4: Select a Frame That Complements Patterned Wallpaper
Wallpaper-Safe Art Hanging Fundamentals
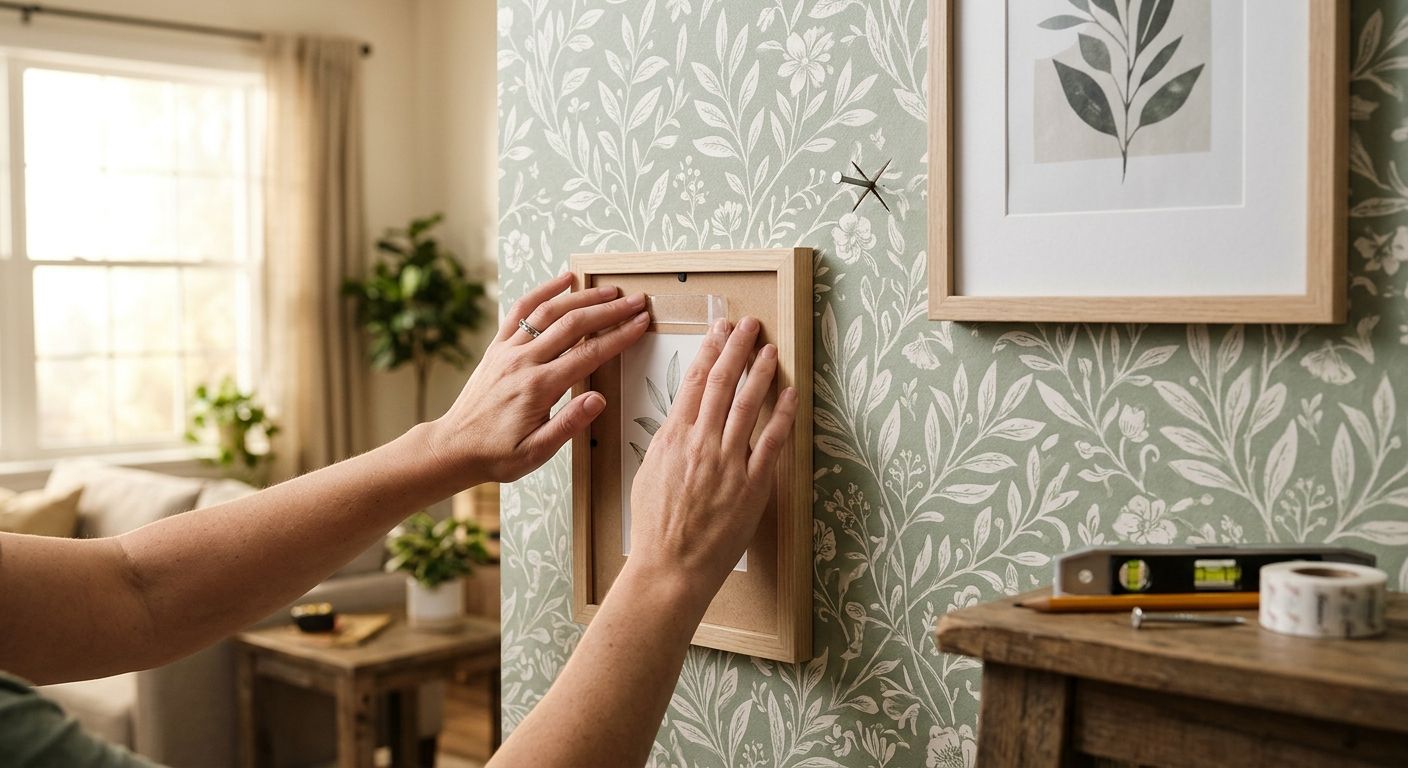
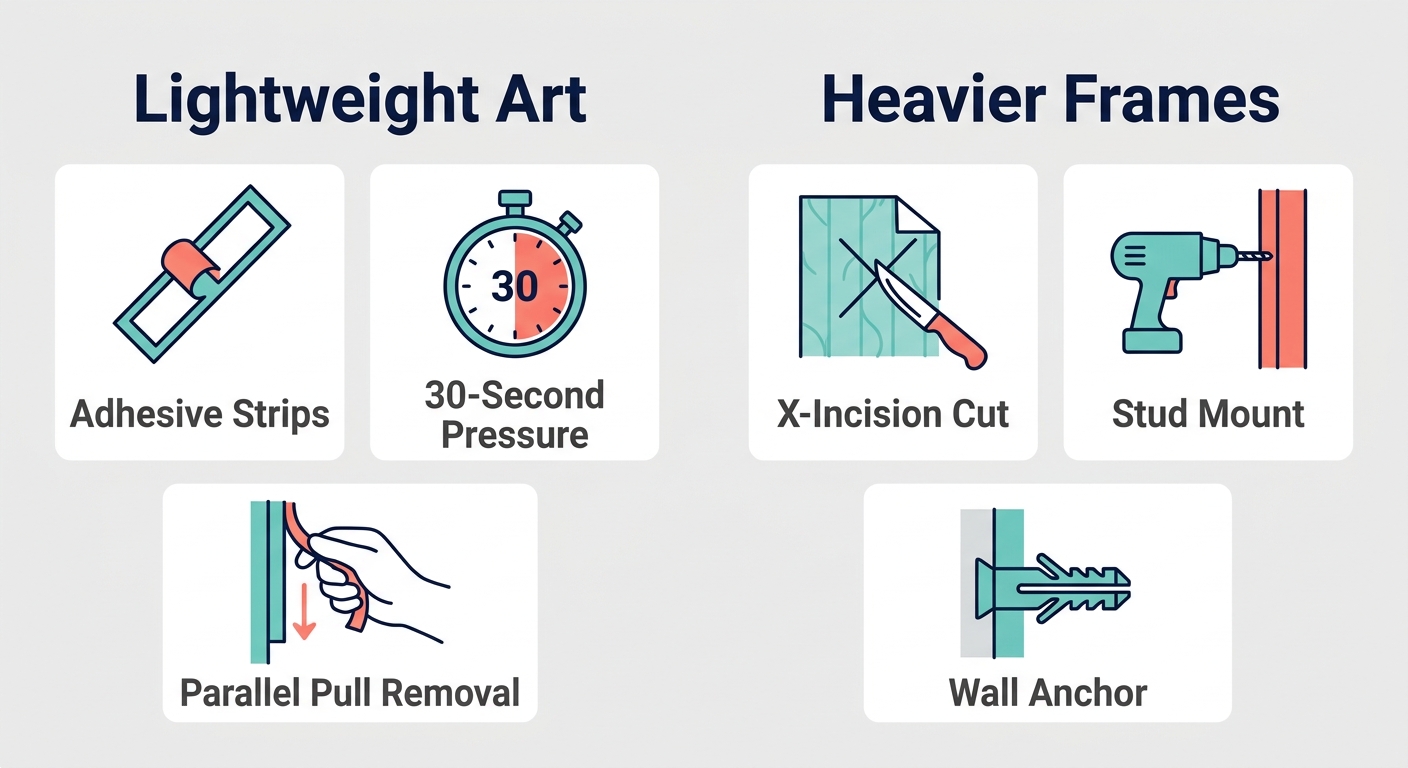
To learn how to hang art on wallpaper safely, you need to match your techniques to the item being hung: Use pressure-sensitive adhesive strips that require only 30 seconds of firm pressure if the frame is light, but make sure the load is transferred to studs or substrates when hanging anything heavy. Wallpaper is more fragile than drywall painted, which means it could tear, delaminate or get stained if regular nails or screws were applied directly into it, so extra caution should be exercised in order to safeguard this kind of surface. Clean off any dust or oil from the wallpapered wall and test adhesives first in a place where they won’t show up on the wallpaper, advises Engineer Fix. Make an X incision (1/8") with your utility knife prior to inserting a pin or nail in order to avoid catching any of the fibers together then fold them down to create an invisible repair. For weight bearing items utilize anchors or attach it to the studs rather than the wallpaper itself as wallpaper will not support this type of load. When you remove it, pull adhesive tabs slowly and parallel to the wall to stretch the polymers and release cleanly. Assess what kind of wall surface you have and collect all necessary supplies.
Key Takeaways
- Before you prepare to hang art over wallpaper, make sure your walls have been thoroughly assessed first.
- With the wall surface assessed, attention shifts to planning a balanced art arrangement over wallpaper.
- With your layout planned, the key to how to hang art on wallpaper without damage is choosing methods that minimize surface trauma.
- After choosing your painter’s tape, make sure you check if your painter’s tape won’t be harmful to wallpaper.
- With the wallpaper clean and well-adhered, the next decision is the frame—selecting the right frame is an essential part of how to hang art on wallpaper successfully.
Before You Begin: Surface Assessment and Tool Preparation
Before you prepare to hang art over wallpaper, make sure your walls have been thoroughly assessed first. Determine if they consist of vinyl, fabric or paper wallpaper. Vinyl wallpaper can support the use of tape much better than delicate fabric or paper varieties, which are more prone to tearing when tape is removed. Check also your wallpapered walls for any cracks, tears or blisters and correct them prior to using tape on these areas to avoid additional damage.
We recommend gathering a level, measuring tape, pencil, and low-tack painter’s tape formulated for delicate surfaces. Before positioning artwork, test the tape on a small inconspicuous area of the wallpaper to confirm it doesn’t lift the finish or leave residue. According to home improvement resource Engineer Fix, adhesive bond strength increases over time, so limit tape application to a few hours when using it for temporary alignment; some experts caution against leaving tape in place for more than 24 hours. If removal feels difficult, gently applying heat from a hairdryer can soften the adhesive and reduce the risk of surface tears.
When the wall-paper was intact and you’ve prepared all your tools, go ahead and determine a plan of the art pieces you will present to make them seem well-balanced yet still professional.
Step 1: Plan Your Art Layout for a Balanced Display
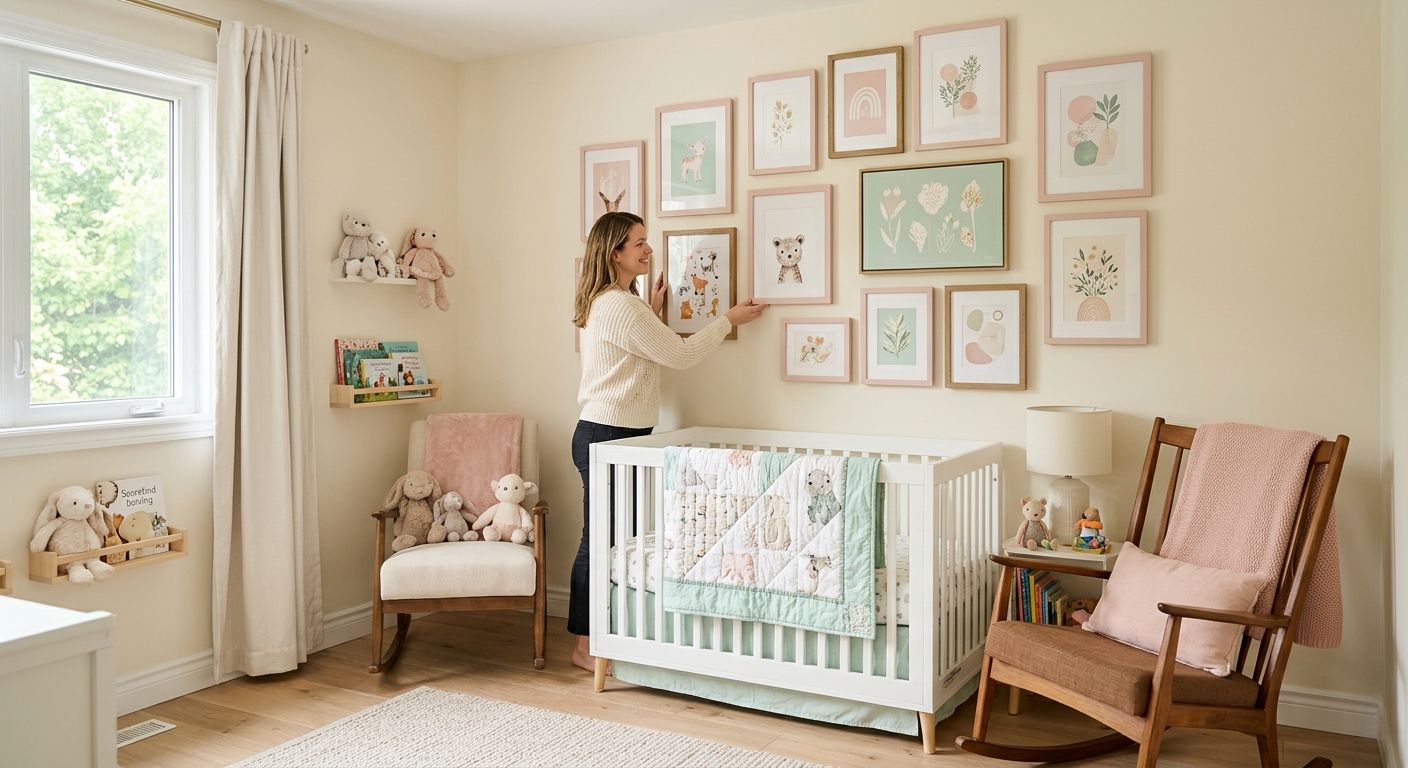
With the wall surface assessed, attention shifts to planning a balanced art arrangement over wallpaper. We recommend using paper templates or low-tack painter’s tape to outline potential art positions on the wall before committing to any hardware. This approach allows easy rearrangement until the layout feels balanced and prevents unnecessary punctures in the wallcovering.
Consider the pattern’s scale and repeat: large motifs call for bolder artwork, while smaller patterns pair well with unified groupings. Supreme Pictures, with over 20 years of framing experience in the Greater Toronto Area, can assist by sizing and finishing art pieces to harmonize with the wallpaper design, drawing on our custom framing and canvas printing services. The art should share a common design language with the wallpaper rather than match it exactly, helping the wall read as a single cohesive canvas.
After determining a balanced composition, another issue to take into account when hanging the wallpaper is protecting its surface.
Step 2: Choose Hanging Methods That Protect Wallpaper
With your layout planned, the key to how to hang art on wallpaper without damage is choosing methods that minimize surface trauma. We recommend temporary adhesive strips. One source notes that 30 seconds of pressure lets the adhesive bond securely without tearing the wallpaper.
In case you have some pins or tiny nails, follow this advice: cut a tiny 1/8-inch X-incision with a utility knife just prior to insertion to prevent tearing and allow the flaps to be restored later.
We use anchoring hardware in the wall (or at least a stud), instead of wallpapering heavy items like canvas paintings or large prints. When you purchase one of our custom frames from Supreme Pictures, your new print will be ready to display once you select the correct anchoring hardware.
After choosing your technique, stick some material on a concealed spot first then clear the surface of any dirt prior to fitting your final tile.
Step 3: Test Adhesion and Clean the Wallpaper Safely
After choosing your painter’s tape, make sure you check if your painter’s tape won’t be harmful to wallpaper. The adhesive bond of painter’s tape can exceed the structural integrity of wallpaper, causing tears or delamination upon removal. One source notes that vinyl wallpapers are generally more durable than fabric or paper-based coverings, but we recommend testing in an inconspicuous area. Painter’s tape should only remain applied to the wallpaper for several hours, since its ability to adhere becomes stronger overtime. Apply a low heat using a hairdryer to warm up the adhesive slightly and then start peeling it from the corner of your wall at a sharp angle.
Before putting down any wallpaper glue you will need to wipe off the entire area with a soft, dry microfiber cloth. You may also lightly dampen the cloth to remove pesky grime. Never saturate the wallpaper because water can make the material curl up in the wet spots and lift or bubble where there is seam or splice. After your wallpaper has been properly prepared, check that the surface is safe to hang before deciding on what kind of frame would complement its design.
Step 4: Select a Frame That Complements Patterned Wallpaper
With the wallpaper clean and well-adhered, the next decision is the frame—selecting the right frame is an essential part of how to hang art on wallpaper successfully. Professional design guidance from DesignDash emphasizes that scale matters: large-pattern wallpapers call for thicker frame profiles to hold their own, while delicate motifs pair better with slim, understated mouldings. Matte black or natural wood finishes ground the composition, and metallic frames can reflect light to add depth. Deeper frames or gallery-box styles create necessary visual separation, preventing a flat look where art and wallpaper compete. Our team recommends testing finishes and mats with a free online preview tool; upload your image and choose a moulding to preview the combination. Consider lighting—directional spots or track lighting can highlight the framed piece and enhance layering while minimizing glare. Once you settle on a frame, you’ll be ready to precisely mark the hanging positions.
Step 5: Mark Positions and Create Clean Entry Points
Proper marking and controlled entry point prevent damage such as tears and delaminating for wallpaper framed art. It’s advisable to start off your installation project clean. Use a microfiber cloth first to clean the installation area, removing any dust or oils that can weaken adhesive bonds. Any adhesives should be tested out on a hidden location before applying to actual wall as this can prevent staining from paper dye and affect wallpaper finish.
When the surface is prepared, pencil lines will indicate exact locations of hooks. If needed for the item being hung, the minimal-penetration technique creates a tiny 1/8-inch X incision with a sharp blade. It’s done with a sharp razor-blade that makes a tiny ‘x’ cut in the wallpaper that causes the paper flap to roll backwards making room for the hardware without tearing any surface fibers. The anchor is inserted at this time and then the paper can be reset back over itself, smoothed down flat once again making a small but barely noticeable opening. This type of hanging can support weight of as much as 15 pounds depending if it has been fastened to either drywall or a stud and still keep the paper from damage, allowing the item to sit well.
Step 6: Mount the Artwork Securely with Minimal Wallpaper Impact
When you’re hanging art over wallpapered surfaces, you need a deliberate approach to prevent tearing and peeling. Using lightweight frames and canvas prints, you can attach them with adhesive strips that require 30 seconds of firm pressure to bond securely.
For heavy objects, such as a light fixture, you’ll need something to screw into the wall studs or the substrate. Never hang heavy items from the wallpaper itself! If the only thing you have at your disposal is some regular old drywall, you will want to purchase a drywall anchor rated for between 5 and 15 pounds of weight. To insert the anchor in the wall without tearing any wallpaper, first make a 1/8” x-shaped cut in the wallpaper. That lets the paper flaps fold back cleanly, preventing rips, and you can smooth them into place afterwards to conceal the hole.
Remove the adhesive strip by pulling the tab slowly and parallel to the wall. Slowly stretching causes the polymer in the strip to release its grip without damaging the surface. Once it has been put up, be sure to check if it is still straight and whether there are small tears in the paper; a little bit of wallpaper paste can mend any small punctures.
Step 7: Perform Final Adjustments and Inspect for Damage
Stand back and verify the frame is level.
In case your pins need some minor tweaking, try the X-incision approach for maximum effect: Make a little 1/8-in X cut in the wall covering using a utility knife, then insert your pin. The benefit here is that you’re not only keeping any tearing from occurring as a result of cutting, but also enabling the torn flaps to be put back together with some wallpaper glue should they start falling off later on. X-incision method
If you’re trying to relocate the adhesive strip, pull the tab slowly and parallel to the wall surface to stretch the polymers and achieve a clean release. Then once you’ve relocated the strip, make sure you press it firmly for 30 seconds. If there was any hardware involved ensure its in place properly i.e. Has gone all the way through to something like a wall stud or a drywall anchor instead of staying inside just the wallpaper.
Small puncture marks or lifting around the edges could usually be fixed easily just by applying some wallpaper paste in those areas that had been damaged. Alternately you could use a little heat and moisture to soften up whatever type of glue was applied there originally.
Troubleshooting Common Wallpaper and Art Display Issues
Minor wallpaper damage and adhesive hang failures are among the most common regrets after we’ve displayed artwork, yet most can be reversed with a few targeted techniques.
Tear damage happens frequently if nails or screws are driven straight into the paper. Before putting in any kind of nails or screws, cut a tiny x-shaped incision utilizing a utility knife prior to placing the nail or screw. The control cuts can enable the paper flaps to lay flat as well as they can then be hidden using a smidgen of wallpaper paste, concealing the punctures.
Sometimes you won’t be able to attach these strips since they aren’t stuck to the wallpaper. It will stick if you apply firm, steady pressure on the strip for at least 30 seconds before taking your fingers off the frame and don’t touch the adhesive with any part of your finger.
Once you’re ready to remove the product and take off the wall piece, don’t rip out the tab right at first glance since it may cause tearing in the wallpaper material. Take hold of the tab but extend it parallelly towards the surface while performing this action slowly. Doing so stretches the adhesive polymers, allowing them to release with minimal pull on the paper fibres.
For artworks weighing more than five to ten lbs., don’t just depend on adhesive strips. Lighter frames can utilize small-diameter nails to pierce through to the substrate of the wall beneath the wallpaper. For heftier pieces, anchor the hardware directly into a stud.
If you follow all of this advice quickly enough, your artwork will stay on your wall in pretty perfect condition. If you have multiple walls being hung up or priceless things that need special attention, get a pro framer. Our crew hangs things up damage-free using conservation-grade materials and techniques to make sure the wall looks clean as can be.
FAQ Block
Should I use a picture rail system to display artwork on wallpapered walls?
Yes, a picture rail or tension-mounted rail system is a safe choice to display artwork on wallpapered walls because it suspends art without puncturing the surface. Design professionals recommend such systems, along with removable hooks and museum gel, to prevent tears or residue.
How can I hang art on wallpaper without causing permanent damage?
Hang art on wallpaper without permanent damage by using pressure-sensitive adhesive strips for lightweight pieces, and for heavier items, make a tiny 1/8-inch X incision with a utility knife before inserting hardware, then anchor directly into a wall stud or substrate. Remove adhesive strips by pulling slowly and parallel to the wall to release cleanly.
Are adhesive strips safe to use for hanging pictures on wallpaper?
Adhesive strips are safe for lightweight pictures when you apply firm pressure for 30 seconds and remove them by pulling the tab slowly parallel to the wall, which stretches the polymer for a clean release. Vinyl wallpapers tolerate them better than paper or fabric; always test in an inconspicuous spot first.
What is the best way to patch a small hole in wallpaper after removing a picture?
The best way to patch a small hole is to apply a small amount of wallpaper paste to re-adhere the edges, or use gentle heat and moisture to reactivate the original adhesive. This method secures the damaged area and leaves the repair nearly invisible.
How do I choose the right frame style to complement patterned wallpaper?
Choose a frame style that matches the wallpaper’s pattern scale: large motifs need thicker profiles, while delicate patterns pair with slim mouldings. Matte black or natural wood finishes ground the composition, and deeper frames or gallery-box styles create visual separation so art and wallpaper don’t compete.
Preserve Your Walls, Showcase Your Art
With the right techniques for balancing motifs, protecting your walls, and lighting your pieces, knowing how to hang art on wallpaper becomes a way to elevate any room. According to design professionals at DesignDash, choosing art that complements your wallpaper’s scale, using removable hooks or museum gel, and adding directional lighting creates a layered, intentional display without compromising the wall finish.
We bring that vision together with custom framing and high-quality printing, backed by over 20 years of experience. Our upload-and-preview process lets you select the perfect moulding and media, with GTA-wide delivery. Because all custom work is made to order, sales are final; however, we will replace any merchandise that arrives damaged in shipping. Payments are processed on a secure merchant page, and we never store your credit card data. Ship times are estimates and may be subject to delays beyond our control.
Transform your walls. Upload your artwork today to preview your design.
Create Your Custom Framed Art
Now that you’ve learned how to hang art on wallpaper without damage—and how to choose a frame that complements your wallpaper—it’s time to bring your vision to life. We offer an easy online tool where you can upload your image, preview it in various frames and mats, and order a professional print. Our master framers, with over 20 years of experience, craft every piece to the highest standards. We deliver across the Greater Toronto Area, including in Mississauga and Brampton, and every order is backed by our complete satisfaction guarantee. Whether you’re displaying a single canvas or a full gallery wall, your artwork will look stunning and stay secure on your wallpapered walls. Start creating your custom piece today using our online tool.